Sunday, August 1, 2010

Honeymoon Part I

Last Sunday was the anniversary of our legal ceremony (we went to a lovely brunch in the morning, fit in a run and saw a play in the evening) and a handy reminder that my recaps are getting stale fast.  I'm going to start these things in earnest, real soon, cross my heart.

But first, I thought I'd share our belated honeymoon-type travels.  For about 2 weeks (06/28-07/10) we roamed around Europe (London, Paris and the French countryside) visiting friends, making new friends and going to another set of friends' wedding (in a chateau!).  We totally didn't mind mini-mini-mooning back in November for our big wedding because we knew this trip was on our horizon.  And we loved spending our 'honeymoon' with friends, since our friends are so far flung it was great to see people we haven't seen in a while.

Part one has us visiting my old friend (and bridesmaid) from architecture school who's making her life out in London.  Our trip also coincided with another architecture school friend's stop over on her way back from South African World Cup madness, so we had a smallish reunion, British style.  The first day consisted mainly of finding food and nice places to take naps throughout London, any park was fair game.  Then we made a quick dinner at her flat and slept as much as we could during the few hours of nighttime (it was light out from about 5 am to 11 pm).


Day two involved the standard tourist's intro to London, because Mr. Moonbeam has never been and there are certain things you just have to see.  We started out down by the London Eye and walked over to Big Ben and Westminster Abby.


Then we made our way over to Trafalgar Square.


On our way to lunch we saw guards on horses somewhere.


Then we found a sandwich shop, picked up some lunch and walked over to a church yard that was filled with Londoners on their lunch break.  After that we walked around St. Paul and headed over to the Tate Modern to walk around in an air-conditioned gallery (we were definitely there during a heat wave).

St. Paul's

Crossing the Thames to get to the Tate

After all that we finished up the day with meat pies and fish and chips at Canteen (sort of a nice dinner chain that uses organic and sustainably raised ingredients).  I think I've had better fish and chips at places that only do fish and chips, but my beef and tomato pie was really, really good.


The next morning, our other friend made her way from South Africa with her boyfriend.  They were all hopped up on vuvuzelas and ready for a crash tour of London.

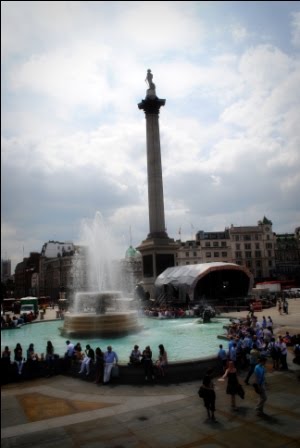
The four of us headed down to the center of London (grabbed a quick pasty, mmm) and made a day of it.  There was a city-wide architecture exhibition going on so we tried to see some of that.  The Victoria and Albert had 6 installations of architectural work to see.  They were a diverse group of spaces and I loved this one.


It's made from split trees, the ground is bagged mulch and the tops looked like palm fronds to me, but they were another tree product.  The inside had been polished smooth with carved words and the outside had been left natural.  Mr. Moonbeam liked this one, he is the quintessential bookworm, and wants nothing more than a place to hang out surrounded by books.


The V&A is really cool and I definitely recommend it.


After that we took a long time to find 'Brick Lane' (or Indian food heaven).  For those who may try to find it in the future, it's near Spitalfields Market.  We walked into one of the first places we saw and had some yummy food.  I found out later, that locals know how to make the most of it.  The kind of bargaining that happens, is I want to spend 'x' amount, I want to bring in my own wine and that's that.  Apparently if they say no, you just move onto the next place.  They are literally every other establishment on the block.  And with that it was back to our friend's flat to hang out and catch up.

Walking through Spitalfield's

The last day, we had to catch the Eurostar at about 5, so we had a good bit of the day to walk around and get a little bit of exploring done.  So the two of us set out to find Hyde Park and I think we just found Kensington Gardens (a smaller part of the park).

We think someone lives here in the park, lucky.


It was still lovely and that was enough for us, so then we went off in search of a Swedish zombie novel that was out in the U.K. but not in print in the U.S. yet.  I don't think you can truly appreciate the joy on Mr. Moonbeam's face when I found that book behind another book on the store's shelves.  He was filled with about as much love for me in that moment as he was on our wedding day.  (Darn, why didn't I take a picture)

So with that we set out to St. Pancras to catch the Eurostar to Paris.  It's a pretty ride and I recommend it if you have to get between London and Paris, but book your tickets early, Eurostar is like airlines in the way that prices go up the longer you wait.  I thought it was like trains that just have a set price, oh well you live and learn.

Sunday, February 7, 2010

Making the Dress, part 3

So, we had the materials and a mockup and then I finally met up with Momma MB in Texas and we got down to business.
I stood around like this a lot. I spent 3 days straight in leggings, with a stick on bra taped to me with painter's tape (so that we wouldn't waste the stickiness) and a tank top, so that I could easily turn into a human dress form at a moment's notice.

It looks easy, but it's actually quite tiring. Anyhoo, many subtle reshaping of pattern pieces later, we ended up with this top. Momma MB did french seams on this lovely, so everything was perfect.

So, small and insignificant when compared to the ridiculous amount of fabric in this skirt.

Here are the two pieces put-together, waiting for the finishing touches.


And this is Momma MB after she fell asleep hand-stitching the horsehair braid at the hem. It helps the skirt to keep it's shape. It was something like 7+ yards (that's 21+ feet) around the circumference of the bottom of the skirt and she had to do it twice! For those using it, you have to stretch the horsehair braid as you sew, so that when you turn it under it fits your hem correctly.

And here's the lovely train, with all of the lace left intact.


You'll notice that the train is detachable for any other cousins who would like to just use the train. The buttons are from that same heirloom dress that the lace came from, and below is the simplest bustle ever. There's a simple loop strategically placed in the middle of the lace and you just hook it around the center button.

And there's the dress, I can't wait for the pro-pics so I can see it all done up.

Tuesday, February 2, 2010

Making the Dress, part 2

So, what to do with heirloom lace that is 50+ years old? If your mother is an avid quilter, you wash it with the same stuff that quilters use to wash antique quilts. A little goes a long way, I only used the soap left on the protective seal after opening this product and there were plenty of suds. The spoonful that comes with it is enough to do a whole quilt, so don't use a lot or you will be rinsing forever.

Don't worry, we didn't just dunk all of the lace in and keep our fingers crossed, we tested a small piece of it first to make sure it didn't disintegrate. Then we dunked it all in a big soapy pot. We then proceeded to rinse it about 12 times. That much lace got really heavy and with all that 'careful kneading' to make sure we didn't rip it, our arms got tired.

Then we laid it on some old sheets to dry in the evening sunlight. Make sure to shape it as you lay it down. You don't want it to stretch in any weird ways. If you'll notice, that piece of lace is the entire skirt of my Grandmother's/Mother's dress. In the finished product you'll see all of this left intact, in case future brides in the family want to use it.

There were a couple of small stains. I used a soft toothbrush and a stain stick of some sort and gave it a shot.

It made it a little lighter, but a 30-50 year old stain isn't necessarily going anywhere.

And months before the big day, Momma MB sent me the first mockup. Then I proceeded to text her pictures of how it fit.

I thought it was fine, but Momma MB had other ideas and the top was adjusted multiple times from this iteration. She wanted me to look like I had a chest and I didn't want to wear a bra. Because if it was going to work with my backless dress I thought it would have to have boning, be one of those crazy tie around bras or cutlets, and none of those options were appealing.

Luckily we found a solution. Victoria's Secret stick on bra, not the cutlet kind. I think it was this one. I got the nude version and it stayed on the whole night and was totally comfortable. And this is coming from a girl who wears sports just about every day of her life.

Anyway, I'll show you the finished project next time. But at least you didn't have to wait until 2 days before your wedding to see it! Love you Momma MB!


Sunday, January 31, 2010

Making the Dress, part 1

Since I've been married for a couple of months now, I guess it's safe to talk about the dress. Momma MB swore me to secrecy before the wedding, but now I can let y'all in on the process of having my mother make my dress.

We started with two patterns from Vogue. I liked the geometric quality of this top, but, clearly, those weird little points had to go. They don't really say 'timeless' to me. And be warned that this top has absolutely no darts and for the non-sewers out there, darts are what give shape to a bodice. They are usually the way you make room for 'womanly' curves. Luckily, I don't have many of said curves up top, so it was possible, though it definitely still gave Momma MB a headache.

V8576
Then we added it to this skirt. We opted for the version without the train because we were going to be making a train out of some very special lace. When I started the whole wedding planning process, I didn't expect to be in such a full skirt, but as Momma MB and I discussed and tried on a few dresses, it became clear that with no bust and a somewhat 'ample' rear, it was going to be the best for my body type. And at 5'10" a full skirt is not going to 'overwhelm' me like I've heard some other ladies talk about. It would also prove to be the most comfortable. It didn't matter what was going on under there, no one was gonna know.


V2979

And here is my crudely done hybrid of the two line drawings above. You can see that we removed the notches from the front and the center piece from the back. It turns out that my back is so narrow, in comparison to my length, that Momma MB just had to remove the center piece and those two points that were a couple of inches apart in the original design were suddenly kissing on my back.
We used 10 yards of dupioni silk. There is a lot of yardage in this skirt. We may have been able to get by with less, but Momma MB ended up cutting out a few versions of the top so that we could get the fit just right. And since there is a very obvious direction to the weave of dupioni silk we wanted to make sure that we had enough room to fit our pieces with the weave going the way we wanted. (Momma MB wanted me to clarify that this is not the same as the 'grain' of a fabric in sewing. That is referring to the amount of stretch in each direction of the fabric there is and makes a difference with how it drapes on the body. I'm just talking about the fact that you can see lines in the fabric from the difference in thickness of the pieces of 'yarn' that the fabric is woven out out. Dupioni has almost no stretch and can probably be draped in any direction you like.)

personal picture of my dupioni silk
10 yards at $15/yd

Momma MB lined the top of the dress with cotton batiste. Batiste is usually used for christening gowns and ladies underthings. It's very smooth, fine and lightweight, it also feels lovely against your skin.
2 yards at $5/yd

We used poly satin to line the skirt, it's better for holding up the weight of the skirt.
8 yards at $7/yd

And in order to give some strength to the entire garment we used silk organza as an underlining. It was cut out and sewn individually to every piece of dupioni silk. You cut the pieces together, then sew them outside of the seam. In essence, you're just making a thicker fabric.

10 yards at $10/yd

The other ingredients of this dress were 8 yards of horsehair braid for the hem, good thread, a zipper, buttons (along with their silk cord closures) from my Grandmother/Mother's dress, and the lace from the same dress for the train. I would also recommend buying pattern weight paper because if you're anything like my Mom (read sewing perfectionist) you'll be demolishing the paper that comes with the pattern after all the changes that sometimes need to be made. In my case there was a lot of lengthening, and some adjusting for the smallish nature of my chest.

So, budget breakdown:
$150 for dupioni silk
$100 for silk organza
$10 for batiste
$56 for poly satin lining
$30-40 for patterns
$20-30 for the horsehair braid and other notions
$20 for other fabric to make a mock up of the dress before using the real stuff. Often people use muslin, but Momma MB used something similar to the poly satin lining so that the drape would be more similar to the silk.
So then add tax and such and you're looking at...
Low $400's for all the dress materials.

Certainly not bad for a one-of-a-kind, super important to me wedding dress. But if I had to pay Momma MB for her time, this dress would certainly be getting into $$$ territory. Thanks Momma MB!

And just for fun, here are some other patterns that I liked and considered. I was all over the map, like most of us are at some point in this process we call 'wedding planning.'

V1030

If any of you are out there making your dress, or having it made, don't be afraid to mix patterns and look in non-bridal patterns. There really aren't that many bridal dress patterns out there and many of them are 'dated' to put it nicely. Oh, and watch out for pattern sales, we were in a hurry to buy something while Momma MB and I were in the same city so she could put the pattern pieces on my body and take a look, but patterns go on sale seasonally and it can mean a savings of $15-20 sometimes. And good luck to Miss Sewing on her dress adventure.

Wednesday, January 20, 2010

Faux-to-booth

Sorry about the absence, I'm still waiting on pro photos and happily I got a new job after the wedding, but it's been busy. Well, here it is folks... The Flower Wall!
And to be honest, I love it. The wall itself was gorgeous and we got some super fun photos out of the whole thing, but there were some lessons to be learned.

For those of you who've been following along, tutorials are here, here and here. I also added some really big accordion flowers (for lack of a better term) and I really think they added some necessary dimension. The biggest one is 18" in diameter.
But first things first. Thanks to this woman, my Grandma! She assembled way more of these flowers than any 82 year old should and I couldn't have done it without her. At least not if I hoped to keep my sanity.

Some of the guests got into it and we got some great photos, ranging from these cute bubble makers.
To myriad of inside jokes from my college friends. This joke does involve alcohol, but truthfully I wasn't that undignified.
This one doesn't involve college drinking antics. I simply had a dream that I was riding a peanut butter and jelly sandwich shaped like a donkey. What? Confused? Anyhoo, it was a thing for a while among us.

(Oh, lesson from this pic, put a mark where people should stand in front of your photobooth, we've got more than a few that are less than centered.)

And of course, who could forget the bridal party acting retarded.

Look at the intensity in those eyes!

And well wishes from the guests. This one advising chocolate will surely be taken to heart.

Closing thoughts:
  • Clear and simple signage. We had a little tiny sign that said to write on the board and use the remote to snap a picture. Eventually a bridesmaid stepped in and instructed people, but if I had to do it over again, there would have been pictorial instructions. I also might have added signs on the tables, so that people could figure out what's going on while doing other things.
  • Put down that center mark and get your camera framed well to the wall. We just had the flower board leaning against the wall and the camera on a tripod (that was guarded by dessert tables, so people wouldn't trip over it) opposite the wall, with a remote attached to the wall with string.
  • Make a couple of announcements, so people realize you'll be using this as your guestbook. If you'll notice most of the pictures I have are of young people, they're camera savvy and understood the concept. I don't have pictures of all of the grandparents and sadly I don't even have pictures of Momma MB and Mr. MB. I mean I have other pictures of them, but none in front of the flower wall.
I'll still be popping in here and there, but I'm waiting on those pro photos. I did get a promising preview though. Oh, and to those who tried to buy this wall from me after I was done with it, I'm sorry, I just couldn't get organized enough to get that together, but it was really fun to make and I'm sure there are a million background ideas out there.